The Twilio Verify API is an SMS and Voice PIN code 2FA authentication solution. It is used to verify that a user is in possession of a phone with a specific phone number. However, with SIM Swap cases on the rise, it's also important to detect if the SIM card associated with the phone number has changed recently. If it has, it could be an indicator that a user has been the victim of a SIM swap attack. This is where the IDlayr SIMCheck API comes in.
The IDlayr SIMCheck API provides information on when the SIM card associated with a mobile phone number was last changed. This provides an extra layer of security in your application login flows by providing an indication of attempted SIM swap fraud. It can be used to augment existing 2FA or anti-fraud workflows.
If you'd prefer to dive into the completed code then head over to the GitHub repo.
Before you begin
Before you begin, there are a few requirements for this project, which are:
- Node 10 or higher
- A Twilio Account
- A IDlayr Account
- SQLite3
Getting Started
Clone the starter-files branch via:
git clone -b starter-files https://github.com/tru-ID/2fa-sim-swap-detection-twilio.git && cd 2fa-sim-swap-detection-twilio
Getting set up with Twilio
You need to configure Twilio using your account credentials.
Copy the values of .env.example into a .env file via:
cp .env.example .env
Open the .env file and configure the following values:
TWILIO_ACCOUNT_SID: Your Twilio account SID, found in the Twilio consoleTWILIO_AUTH_TOKEN: Your Twilio Auth Token, which can be found in the Twilio consoleVERIFICATION_SID: This project uses Twilio Verify to send verification codes and to check their status – create a service
Getting set up with IDlayr
A IDlayr Account is needed to make the SIMCheck API requests, so make sure you've created one.You're also going to need some Project credentials from IDlayr to make API calls. So sign up for a IDlayr account, which comes with some free credit. We've built a CLI for you to manage your IDlayr account, projects, and credentials within your Terminal. To install the IDlayr CLI run the following command:npm install -g @tru_id/cli
tru login <YOUR_IDENTITY_PROVIDER> (this is one of google, github, or microsoft) using the Identity Provider you used when signing up. This command will open a new browser window and ask you to confirm your login. A successful login will show something similar to the below:Success. Tokens were written to /Users/user/.config/@tru_id/cli/config.json. You can now close the browser
config.json file contains some information you won't need to modify. This config file includes your Workspace Data Residency (EU, IN, US), your Workspace ID, and token information such as your scope.Create a new IDlayr project within the root directory with the following command:tru projects:create 2fa-simswap --project-dir .
Configure the following values in your .env:
TRU_ID_CLIENT: The client ID found in thetru.jsonfile in the newly created IDlayr project.TRU_ID_SECRET: The client secret found in thetru.jsonfile in the newly created IDlayr project.
Starting the project
First, start up SQLite3 if not already running.
Next, in the project directory, install dependencies via:
npm install
This will also run database migrations creating the users table.
Finally, to start the project, run:
npm run nixstart #for running on Mac or Linux machines# ornpm run winstart #for running on Windows machines
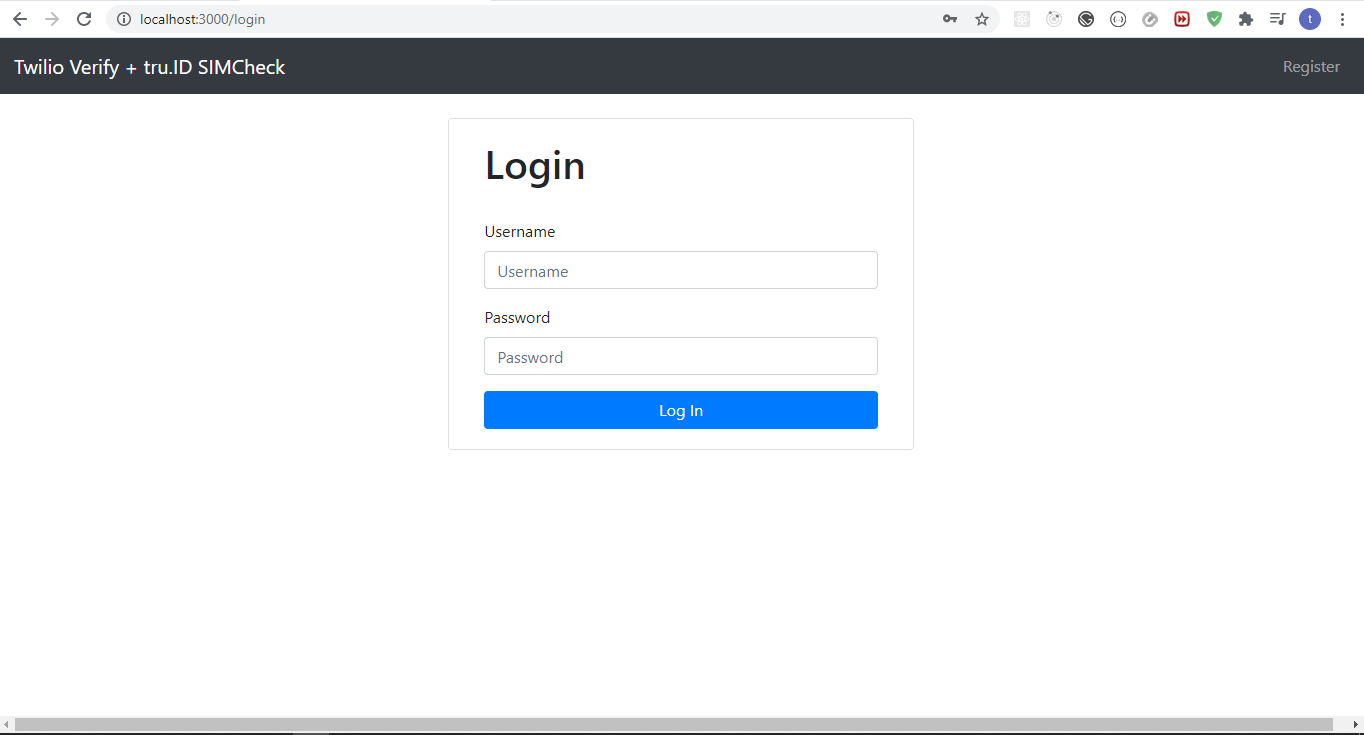
The project looks like this on startup:

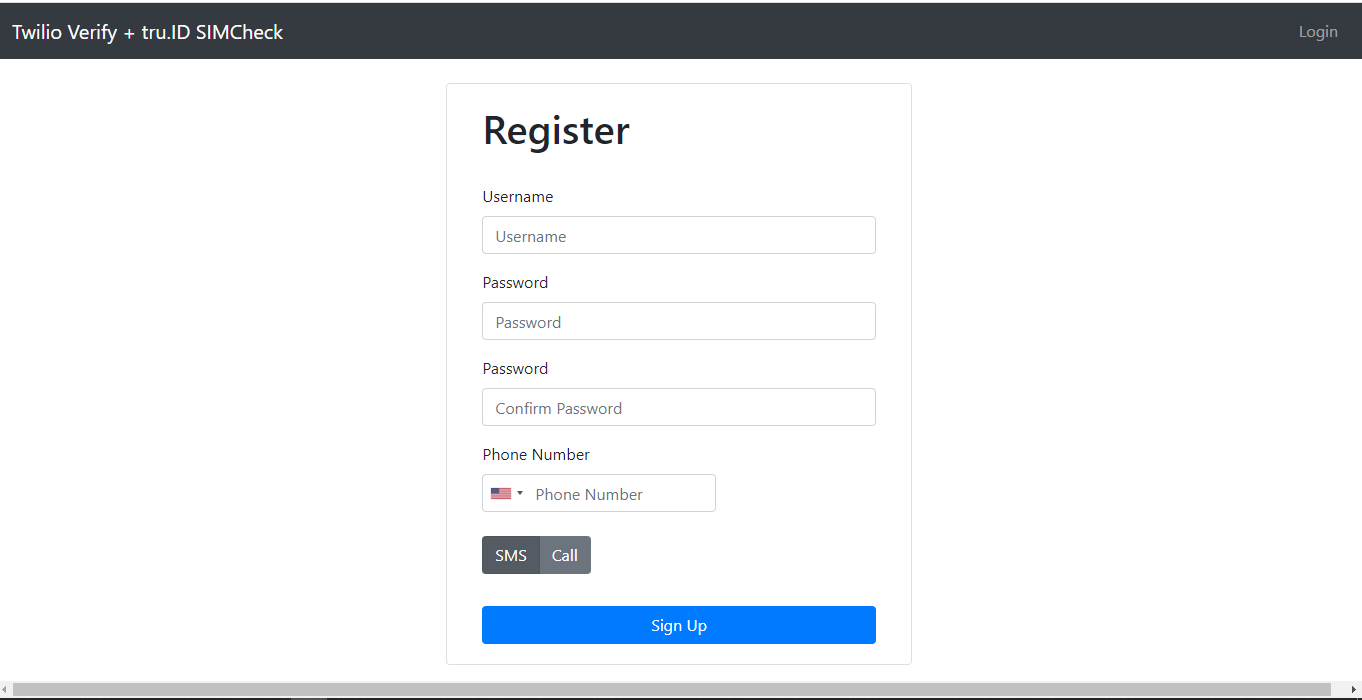
And the register page looks like this:

Existing App Workflow
The existing app workflow is as follows:
- Navigate to
/, redirect to/loginif not logged in. - Login an existing user or register a new user.
- On successful registration or login, redirect to
/. If the user does not have the appropriate role, redirect to/verifyfor SMS or Voice OTP verification with Twilio's Verify API to take place. - If OTP could not be sent, or OTP does not match, render error to the user. If OTP matches, assign a role to the user so as to access the guarded
/route and redirect to/.
Workflow with SIM Swap Detection
We're going to introduce SIM Swap detection to the existing workflow by doing a SIMCheck right before an SMS or Voice OTP is generated. Depending on the result, we either proceed with generating the OTP, or stop the login process. That's it!
The workflow now looks like this:
- Navigate to
/, redirect to/loginif not logged in. - Login an existing user or register a new user.
- On successful registration or login, redirect to
/. If the user does not have the appropriate role, redirect to/verify. - Perform SIMCheck before SMS or Voice OTP generation. Stop the login process if SIMCheck fails, otherwise continue with OTP generation.
- If OTP could not be sent, or OTP does not match, render error to the user. If OTP matches, assign a role to the user so as to access the guarded
/route and redirect to/.
Additionally, upon logout we'll clear down the role so a SIMCheck and OTP is performed on every login.
Performing the SIMCheck
In order to perform the SIMCheck we need to do two things:
- Create a IDlayr access token.
- Create a SIMCheck using the newly generated access token.
In order to do either of these things, we need to bring in a few packages. Open a new terminal and run:
npm install --save btoa node-fetch
btoa transforms data to base-64 encoded format and node-fetch allows us to make HTTP network requests in our Node applications.
Creating the Access Token
In order to create the access token create a new directory called helpers , create a file named createAccessToken.js with the following code:
const btoa = require('btoa')const fetch = require('node-fetch')exports.createAccessToken = async () => {/* make request body acceptable by application/x-www-form-urlencoded*/const clientID = process.env.TRU_ID_CLIENTconst clientSecret = process.env.TRU_ID_SECRETconst basicAuth = btoa(`${clientID}:${clientSecret}`)const resp = await fetch(`https://{data_residency}.api.idlayr.com/oauth2/v1/token`,{method: 'POST',body: 'grant_type=client_credentials&scope=sim_check',headers: {'Content-Type': 'application/x-www-form-urlencoded',Authorization: `Basic ${basicAuth}`,},},)const { access_token } = await resp.json()return access_token}
To create an access token, we make a form URL encoded POST request to the https://{data_residency}.api.idlayr.com/oauth2/v1/token endpoint. This endpoint uses basic auth so requires an Authorization header.
The header value is your IDlayr project client_id and client_secret that we saved to the .env file earlier, concatenated with a colon (:) and Base64 encoded.
The body is set to have a grant_type of client_credentials and scope of sim_check.
The scope instructs the IDlayr OAuth2 provider that the created Access Token should have permissions to use SIMCheck resources, as indicated by sim_check.
Creating the SIMCheck
In the helpers directory, create a file named performSimCheck.js and paste the following code:
const fetch = require('node-fetch')const logger = require('../logger')()exports.performSimCheck = async (phone_number, access_token) => {const body = JSON.stringify({ phone_number })const response = await fetch(`https://{data_residency}.api.idlayr.com/sim_check/v0.1/checks`,{method: 'POST',body,headers: {Authorization: `Bearer ${access_token}`,'Content-Type': 'application/json',},},)const data = await response.json()logger.debug(data)return data.no_sim_change}
Here, we accept a phone_number in E.164 format, the access_token from the previous step, and create the SIMCheck resource. A successful SIMCheck resource creation response is represented by a 201 HTTP status code. The payload response provides information on whether the SIM has changed or not.
A sample successful response is:
{"_links": {"self": {"href": "https://{data_residency}.api.idlayr.com/sim_check/v0.1/c6-bbae-50358ae3bb08"}},"check_id": "2563f2a6-0b9e-49c6-bbae-50358ae3bb08","status": "COMPLETED","no_sim_change": true,"charge_amount": 1,"charge_currency": "API","created_at": "2021-03-17T14:49:29+0000","snapshot_balance": 13}
A 400 HTTP status may be returned if IDlayr doesn't support the phone number. An example of that is as follows:
{type: 'https://idlayr.com/docs/api-errors#mno_not_supported',title: 'Bad Request',status: 400,detail: '400 Bad Request Mobile Network Operator Not Supported'}
SIMCheck with Registration
The SIMCheck API informs us if the SIM has changed within the last seven days – but if the user is registering within seven days of a SIM change, we should still allow the registration. We'll go into the details of this later, but for now let's make an update to the database model to facilitate the checks.
Stop the development server, navigate to models/user.js, and add the following code to sequelize.define("User", {}) :
const User = sequelize.define("User", {// old code...fullyVerified: {type: DataTypes.BOOLEAN,allowNull: true,}});
Next, create a new migration file to update the columns in the Users table via:
npx sequelize-cli migration:create --name modify_users_add_new_fields
The newly created migrations file should end with -modify_users_add_new_fields.js. Navigate to the file and replace the contents of the file with the following:
module.exports = {up: async (queryInterface, Sequelize) => {return Promise.all([queryInterface.addColumn('Users', 'fullyVerified', {type: Sequelize.BOOLEAN,allowNull: true,}),])},down: async (queryInterface, Sequelize) => {// logic for reverting changesreturn Promise.all([queryInterface.removeColumn('Users', 'fullyVerified')])},}
We then run migrations by running the command:
npx sequelize-cli db:migrate
You can now start your development server again.
Integrating the SIMCheck functions
Now we need to integrate our changes to augment the workflow. Head over to routes/verify.js, include our two helper functions and in the try of router.get('/', ensureLoggedIn(),async (req,res)=> {}), create an access token via createAccessToken and then create a SIMCheck using performSimCheck:
const { createAccessToken } = require('../helpers/createAccessToken')const { performSimCheck } = require('../helpers/performSimCheck')const passSIMCheck = function (user, noSimChange) {const sevenDaysMilliseconds = 7 * 24 * 60 * 60 * 1000if (noSimChange) return trueif (user.fullyVerified) return falseif (Date.now() - user.createdAt > sevenDaysMilliseconds) return falsereturn true}router.get('/', ensureLoggedIn(), async (req, res) => {if (req.user.role !== 'access secret content') {const errors = { wasValidated: false }const channel = req.user.verificationMethodlet verificationRequesttry {//create IDlayr access tokenconst accessToken = await createAccessToken()console.log(accessToken)// perform SIMCheckconst noSimChange = await performSimCheck(req.user.phoneNumber.replace(/\s+/g, ''),accessToken,)console.log(noSimChange)// If the SIM has changed within 7 days, the user has not successfully performed a SIMCheck before// and the user is older than 7 days we render our `sim-changed` viewif (passSIMCheck(req.user, noSimChange) === false) {// TODO: render error UI and stop the flowreturn res.status(501)}if (noSimChange === true && !req.user.fullyVerified) {req.user.fullyVerified = trueawait req.user.save()}// every other scenario i.e. sim changed but the user isn't up to 7 days orverificationRequest = await twilio.verify.services(VERIFICATION_SID).verifications.create({ to: req.user.phoneNumber, channel })} catch (e) {logger.error(e)return res.status(500).send(e)}logger.debug(verificationRequest)return res.render('verify', { title: 'Verify', user: req.user, errors })}throw new Error('User already has `access secret content` role.')})
We add a helper function passSIMCheck, which helps us handle the case where we should still accept a registration even if the SIMCheck fails:
- If the SIM not changed i.e.
noSimChange === truewe returntrue - If
noSimChange === falseand either of the the following arefalsewe fail the check:- If the user has been verified before via
user.fullyVerified - If the user was created over 7 days ago, meaning their SIM card check should be passing
- If the user has been verified before via
- If all these conditions do not return a value, we then return
true, as the user is still within a period where a SIMCheck failure can't be used to identify a problem
Right before we generate the OTP, we create the access token and perform the SIMCheck. We then check if the value of passSIMCheck equals false, which takes into account both if the SIM has changed recently and the criteria (above) for allowing a user to proceed upon a SIMCheck failure.
If the SIMCheck passed, and the user has not previously had a successful SIMCheck, then we update user.fullyVerified to be true and save.
Afterwards, we perform OTP verification.
Handling Failure
Next, we need to create the UI we'll use to handle the failure scenario. Head over to the views directory, create a file named sim-changed.pug, and add the following:
extends layoutblock content.text-centerh1 #{error}
#{error} is dynamic, meaning we pass it in when we render this view.
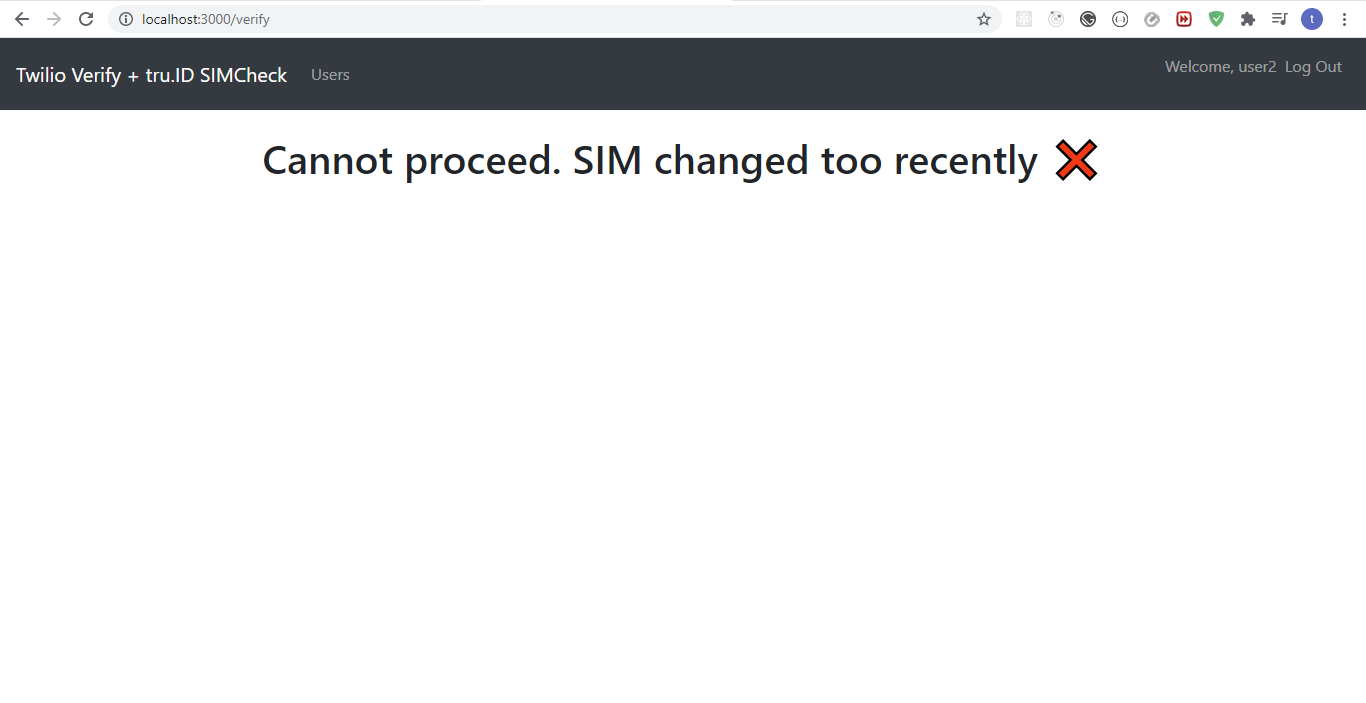
The UI looks like this:

Add the code to render the error UI within routes/verify.js:
if (passSIMCheck(req.user, noSimChange) === false) {return res.render('sim-changed', {error: 'Cannot proceed. SIM changed too recently ❌',})}
Revoking user roles on logout
Finally, we need to revoke user roles when they log out, because at the moment when a user logs out and logs back in, they do not need to do an OTP verification, and we would like them to do that on every login.
Navigate to routes/auth.js to router.get('/logout', (req,res)=>{}) and replace it with:
router.get('/logout', async (req, res) => {req.user.role = ''await req.user.save()req.logout()res.redirect('/')})
In the code above, we set the user's role to an empty string and save it to the database before they log out.
Wrapping up
That's it! That's how simple it is to add SIM Swap detection to your existing 2FA application with IDlayr's SIMCheck API.
You can grab the completed code on GitHub and view the diff between this app and Twilio's demo apps to see the changes required to add SIM Swap detection to an existing 2FA app.


